Unifi Installation Guide
Installation Guide
English | Bahasa Malaysia | Mandarin | Tamil
Installation Guide
From making an appointment to the signing-off of the Service Acceptance Form, here is a complete step-by-step process of how we bring UniFi into your home or office.
-
Step 1: Setting the appointment
Appointment is made at the point of registration. You may choose your preferred date and time for UniFi installation but please note that installation for FTTx (Fibre to the Home or Office) is expected to take between 4-8 hours, and for VDSL2, 2-3 hours.
24 hours prior to the agreed installation date and time, the TM UniFi Centre will call you for a final confirmation. Our UniFi technician will also call you just before he goes to the agreed address of installation.
-
Step 2: Site Assessment
Upon arrival at your home or office, our technician will brief you on the step-by-step process of the entire installation. This includes:
- (i) Site assessessment (outdoor and indoor)
- (ii) Cable entrance (drilling point for FTTx)
- (iii) Equipment termination point
- (iv) Route of wiring
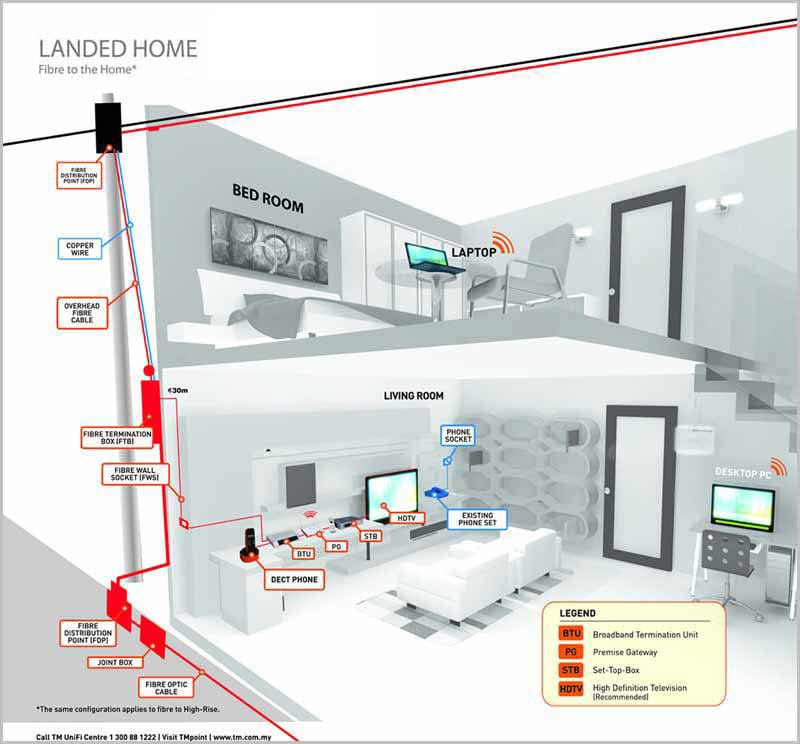
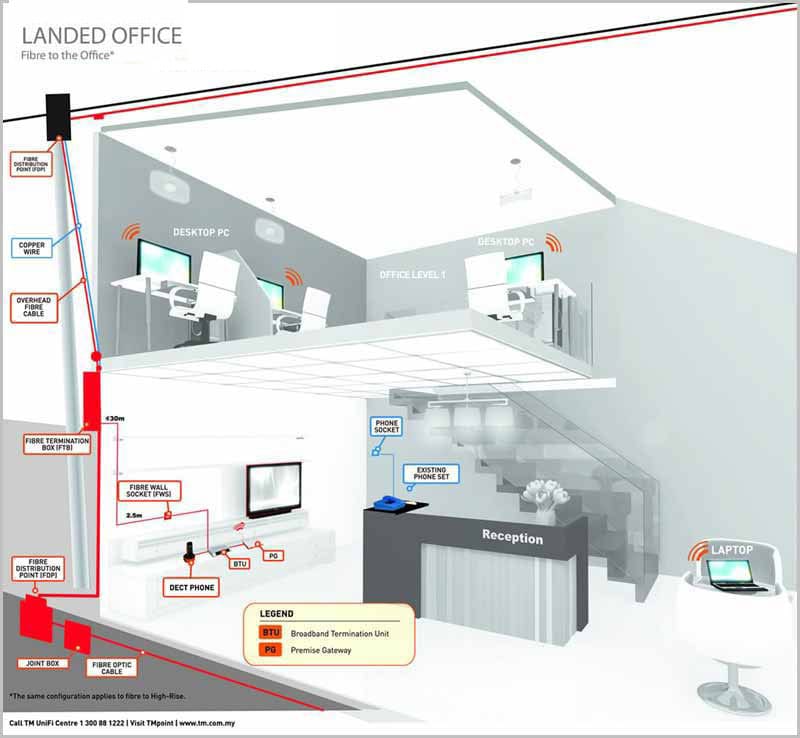
In the case of FTTx installation, our technician will determine the location of the Fibre Distribution Point (FDP), whether it is located on an overhead pole, or underground. If the underground fibre access is blocked due to any home or office renovation, it may require a longer installation period than for overhead fibre access installation.
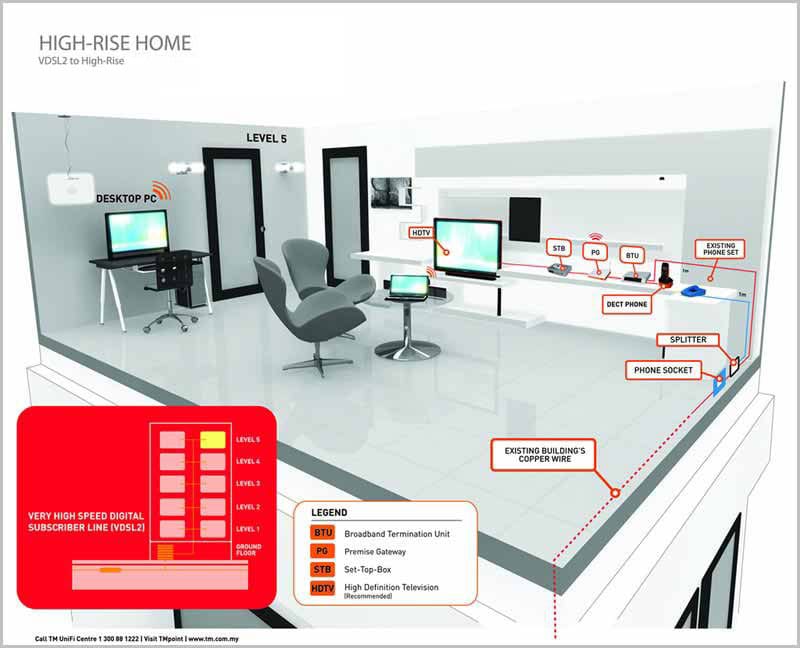
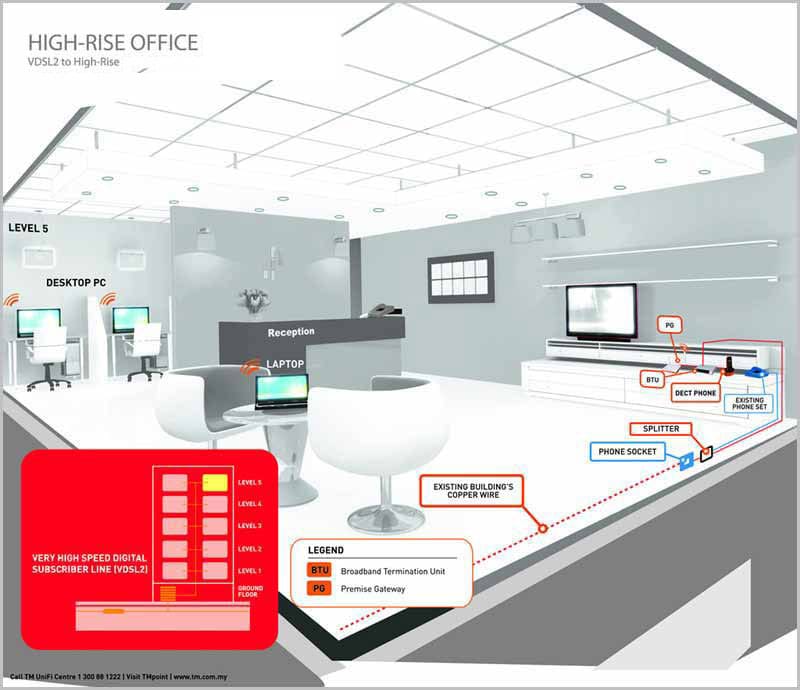
For VDSL2, site assessment is much quicker since our technician need only access the building’s MDF room and perform the necessary cabling there.
Note: VDSL2 - your existing Streamyx or Business Broadband access will be disabled during this exercise. -
Step 3: Installation Activities
It's time to complete the installation process. As part of this process, some minimal drilling may be required. After laying the cables we will determine which modem is suitable for your home. Indoor installation requires more time as our technician needs to lay the internal fibre optic cable. Cables of sufficient length will be provided. However, in cases where additional cable lengths are required, some minimal charges will be incurred. To prevent unsightly wiring, wires and cables will be housed in proper casings.
However, if you wish it to be a drill-free installation, and if the fibre optic cables are required to be pulled through your home or office ceiling, we have a panel of contractors that you can work with, the costs of which will be borne by you.
VDSL2 does not require drilling since UniFi connection will come from the existing phone jack in your home or office. For this premise type, indoor installation requires minimal setup time.
-
Step 4: Equipment Set Up
After laying all the cables, it’s time to connect the equipment. Our technician will first set up the BTU followed by Premise Gateway, Set-top-Box (for Residential package only) and DECT Phone. Once the equipment is tested and works properly, our technician will then show you that all the services are in working order.
-
Step 5: Completion
You are required to sign-off a Service Acceptance Form (SAF) as part of the process to complete the installation work. For a complete understanding of what TM UniFi service is, please read the terms and conditions in your service agreement. If you require more information or encounter any problems with the services, please contact us through any of the following avenues:
Email us at apply@unifi.com.co


